17 Nov How to Add GIFs to Indiegogo Campaign – A Step by Step Guide
GIFs are an important and effective addition to your Indiegogo campaign – but adding them may not be as simple as copy/paste.
If you’re struggling with adding GIFs to Indiegogo campaigns, this step-by-step guide is exactly what you need.
But before, the how, let’s talk about the why!
Why Do You Need to Add GIFs to Indiegogo Campaigns?
Because GIFs lighten the mood and are easy on the reader. It’s the perfect balance between pictures and videos where you’d want the reader to acknowledge a certain point or feature without overwhelming them or demanding them to watch a video clip.
GIFs are also a great way to add some light humor to your landing page content. You don’t want to force the reader through 1000+ words of elaborate specifications. You want to tap into their emotions, get them to smile, lead them easily through the story narration.
This is where GIFs come in handy. And while you can easily get GIFs from GIPHY, making your own GIFs is next-level cool. Get your team to pose, make your narration interesting and increase engagement levels with custom GIFs.
For instance, this simple Facebook GIF ad by Vue Cinemas was enough to get people talk/share about the brand across the internet!

Even if you don’t have the creative resources to pull off this level of GIF creation, you can always create custom GIFs using your phone’s slow-mo recording options. There is so much you can do with GIFs – you just got to be creative about it!
How Do You Begin Adding GIFs in Indiegogo Campaigns?
Ok so this was supposed to be simple. Just copy/paste the GIF image and you’re done. Right?
Nope.
Indiegogo decided to make it a tad bit hard to add GIFs in your campaign.
According to Indiegogo:
‘As of August 1, 2015, users are no longer able to upload GIFs to their campaign. GIFs you currently see are on campaigns that were created prior to that date. However, you can still use animated GIFs in your campaign.’
But because GIFs are so cool, we will have to find a workaround!
So, here goes:
Step 1: Make Your GIF (Skip this if you know how to make a GIF on GIPHY)
Like I mentioned before, it’s always better to create your own GIFs. If you’ve got a high-end phones, creating a GIF is super easy. If not, you can always use a platform like GIPHY to create your own GIF.
To create a GIF on GIPHY, first create an account. Once done, click on Create.

Next upload the photo or clip you want to turn into a GIF and spend time checking out some of the coolest features on the platform. You can add stickers, backdrops, text, and a dozen other things to make amazing GIFs.
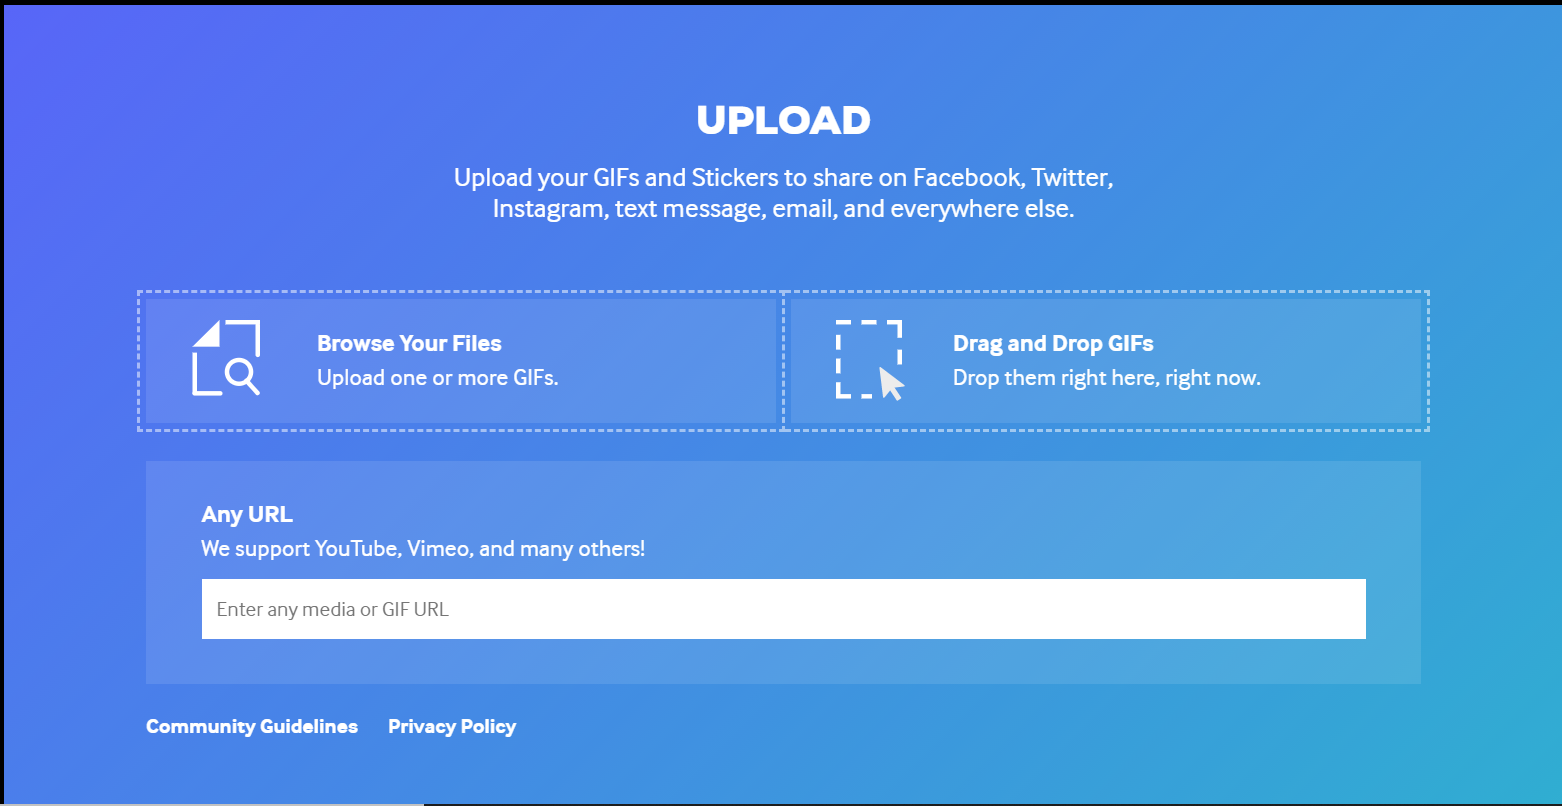
Once done, hit Upload and the GIF is ready for use!
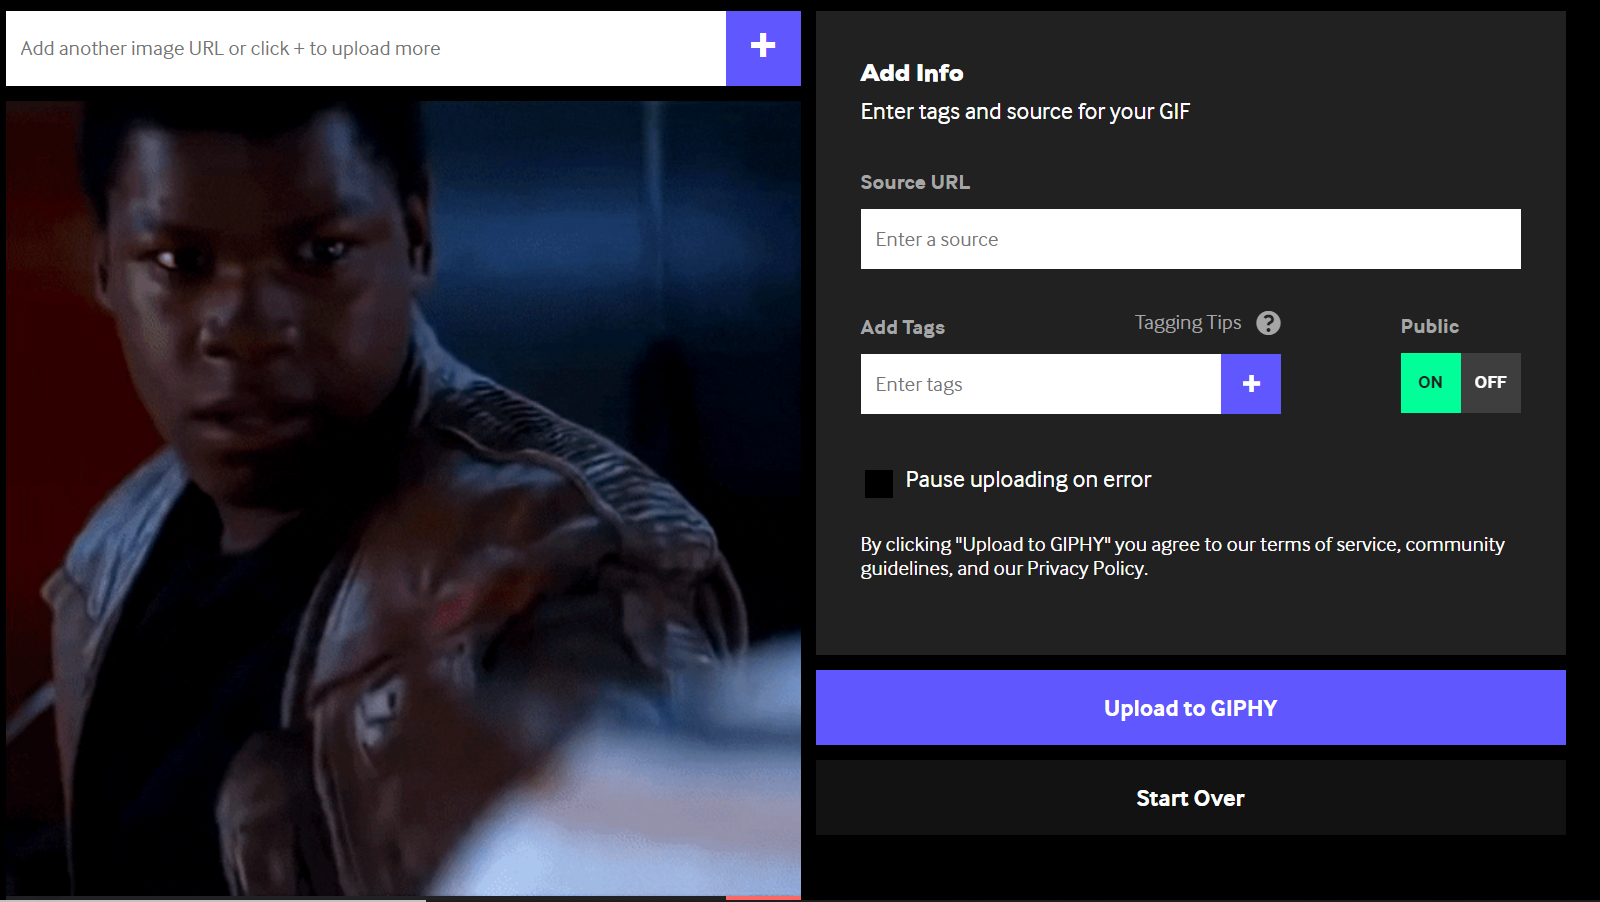
Step 2: Upload an Existing GIF to GIPHY
If you’ve made a GIF using your phone, you can simply upload it to GIPHY.
Step 3: Copy the GIF Link

This GIF was taken from VUE Cinema
Your GIF will have a unique link in three different formats.

Pick the MEDIA link because as per Indiegogo’s guidelines, the GIF URL MUST end in .gif.
Step 4: Launch Indiegogo Campaign Editor
Hah! Here’s where it gets interesting 🧐.
Go to the Campaign Editor of your Indiegogo page and click on the Content Tab.
Next, launch the HTML view of the Story by selecting the Source button on the far right of your editing toolbar.

Scroll to the section you want to insert the GIF and add the URL within this code:

Step 5: Save Changes
Select Source again to return to the regular editing view and then Save Changes.
The GIF will not be visible on your campaign page.
PRO TIP 1 : Use the CTRL + F to find the words or section where you want to add the GIF. A best practice would be to have the HTML editor view launched in a new tab.
PRO TIP 2: Don’t do this as you go. Make a GIF collection. Take screenshots of areas where you want the GIF to appear and when you make all your GIFs, simply place the links exactly where you need to. You won’t have to waste time going to and fro.
Some Key Things to Remember
While you can easily copy/paste GIFs into WordPress, you can’t do the same for the Indiegogo Campaign Editor. Additionally, platforms like GIPHY do not easily allow for third-party integrations, so you will have to make sure you get the links right to have GIFs appear.
Some key things to remember:
- The GIF link must end in a .gif extension or the image won’t load.
- You can only add links in the HTML view
- Make sure you get the code correct and there is a space between img and src in your code
- Click Source to return to the regular, non-HTML editing view before you save or your changes will be lost.
And that’s it!
You May Also Like to Read:
How to Use Facebook Marketing to Boost Your Indiegogo Campaign – A Beginner’s Guide, Part 1
Don’t be afraid of adding GIFs to Indiegogo campaigns. With just a little effort, you’ll make it easier for readers/backers to understand your product enough for them to pledge!

No Comments